Crochet guide
How to crochet in the round: increases that lie flat
Updated by Khokhar Sab
Make a magic ring and work your first round into it, often 6 single crochet, 8 half double or 12 double crochet. Each round after that adds the same number of stitches as the first round had. So round 2 has twice as many, round 3 three times as many, and so on. That steady growth keeps the circle flat.
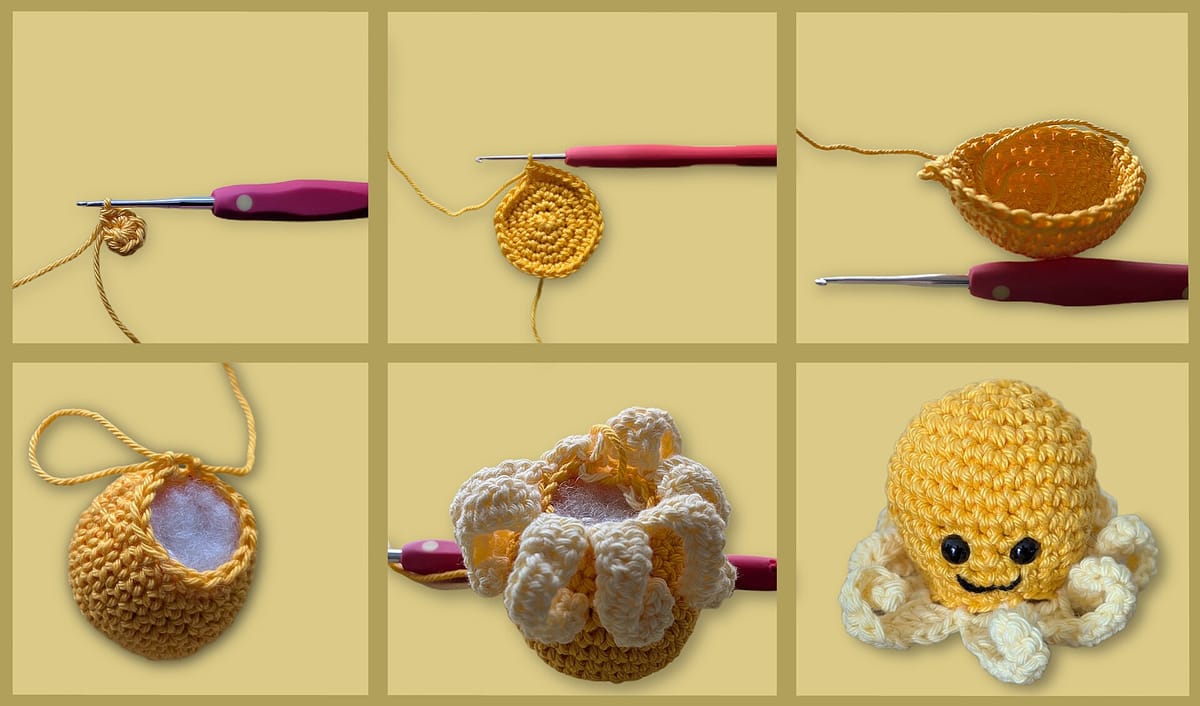
Starting to crochet in the round: the magic ring
Most work in the round starts with a magic ring, also called a magic circle. It is an adjustable loop you crochet into and then pull closed, so the center has no hole.
- Wrap the yarn around two fingers to form a loop, with the tail behind.
- Put the hook through the loop, catch the working yarn and pull up a loop.
- Chain 1 for single crochet, or the right turning chain for a taller stitch.
- Work the first round of stitches into the ring, over both the loop and the tail.
- Pull the tail to close the ring tight.
If the ring feels fiddly, chain 2 and work the first round into the second chain from the hook instead. That leaves a tiny hole, which stuffing or a tight tail usually hides.
A third start is the chain ring. The Dummies tutorial chains 6, slip stitches into the first chain to close a ring, then works single crochet into the center until no more fit. Unlike a magic ring, it can't be pulled closed, so the center keeps a small hole.
Joined rounds and spiral rounds
In both methods you keep the right side facing you and don't turn at the end of a round. Pops de Milk, We Are Knitters and Look At What I Made all say this. You can work rounds two ways. In joined rounds, you slip stitch into the first stitch at the end of each round, then chain up to start the next one. Hats and flat circles in taller stitches are often worked this way.
In spiral rounds, also called continuous rounds, you never join. You just work the first stitch of the new round into the first stitch of the last one. Amigurumi uses spirals because they leave no seam line. Put a stitch marker in the first stitch of each round and move it up as you go, or you will lose track of where rounds begin. The guide to counting rows has more on markers.
Seams, jogs and where to start the round
Look At What I Made compares the methods side by side. A joined round leaves a visible seam that slowly creeps sideways as the piece grows. Where you put the first stitch after the join matters. Working it into the same stitch as the slip stitch gives a gappy, bumpy seam. Working it into the next stitch gives a much neater one, and that author calls it a favorite. The same tutorial warns that this neater method can't be swapped with the others partway through a piece with shaping.
Spirals have no seam, but taller stitches leave a step where the spiral starts. For a double crochet spiral, the same author replaces the first two double crochet with a single crochet and a half double, so the height builds up gradually. A strand of scrap yarn flipped forward and back at the start of each round, a running stitch marker, shows where rounds begin.
Joined rounds start with a chain, just like rows. Pattern Princess reads it from the join. "Join to the top of the chain" means the chain counts as a stitch, and "join to the first stitch" means it doesn't. The turning chains guide explains how many chains each stitch needs.
Why every round adds the same number of stitches
A flat circle grows in a simple pattern. Each round sits a little farther from the center, so its circumference grows by the same amount every time. The number of stitches has to grow by the same amount too.
So the first round sets the step. Start with 6 stitches and add 6 every round: 6, 12, 18, 24, 30. Round r has 6 × r stitches. You spread the increases evenly:
- Round 2: 2 stitches in every stitch (12).
- Round 3: 1 stitch in the next stitch, 2 in the next, all around (18).
- Round 4: 1 stitch in each of the next 2, 2 in the next, all around (24).
Each round has one more plain stitch between increases than the round before. If you stack every increase right above the last one, the circle turns into a hexagon with six corners. Starting the repeat a few stitches later on alternate rounds moves the increases and keeps the edge round.
Increase chart for the first 8 rounds
The same repeat works for any start. Only the number of times you repeat it changes: 6 times for a 6 stitch start, 8 for 8 and 12 for 12.
| Round | Repeat | 6 stitch start | 8 stitch start | 12 stitch start |
|---|---|---|---|---|
| Round 1 | start stitches into the ring | 6 | 8 | 12 |
| Round 2 | inc in each st around | 12 | 16 | 24 |
| Round 3 | [sc, inc] | 18 | 24 | 36 |
| Round 4 | [sc in next 2, inc] | 24 | 32 | 48 |
| Round 5 | [sc in next 3, inc] | 30 | 40 | 60 |
| Round 6 | [sc in next 4, inc] | 36 | 48 | 72 |
| Round 7 | [sc in next 5, inc] | 42 | 56 | 84 |
| Round 8 | [sc in next 6, inc] | 48 | 64 | 96 |
"Inc" means 2 stitches in one stitch. The repeats are written in single crochet; for an 8 or 12 stitch start, read them in half double or double crochet. Round 1 is the stitches you work into the ring.
Why 6, 8 and 12 stitch starts differ
The right step depends on how tall a round is compared with how wide a stitch is. Each round adds about 2π times its height to the circumference. Divide by the width of one stitch and you get the number of stitches to add.
stitches to add per round ≈ 2π × stitch height ÷ stitch width
Single crochet is close to square, about as tall as it is wide. With the amigurumi gauge the amigurumi ball calculator uses by default, 20 stitches and 20 rounds in 4 inches, the formula gives 2π × 20 ÷ 20 = 6.28. Round that to 6, the classic single crochet start.
Double crochet is about twice as tall as it is wide. The hat calculator's default double crochet gauge is 12 stitches and 7 rounds in 4 inches, which gives 2π × 12 ÷ 7 = 10.8. That is close to 12, the usual double crochet start. Half double sits in between, so 8 is common for it. Your own gauge may push the best number up or down by one or two.
What happens with the wrong start
Too few stitches per round and the circle cups into a bowl. Too many and it ruffles like a lettuce leaf. You can check the math with the hat numbers.
For a 22 inch head, the hat calculator aims for a crown of 60 stitches. Starting with 12, that takes 5 increase rounds: 12, 24, 36, 48, 60. Those rounds stand about 2.9 inches from center to edge. The finished crown measures 6.4 inches across, a radius of 3.2 inches. The two numbers are close, so the crown lies flat.
Start with 6 in the same double crochet and you need 10 rounds to reach 60 stitches. Those rounds would stand 5.7 inches tall for the same 3.2 inch radius. The extra height has nowhere to go, so the piece cups. For a hat, the hat sizing guide explains when to stop increasing.
Stop increasing for a tube
Hats and baskets start as a flat circle, then stop increasing. Pattern Princess explains that once the increases stop, the circle turns into a tube, and the round where you stopped becomes the first round of the sides. The change shows sooner with tall stitches. Pattern Princess gives a rough guide to how many even rounds it takes before the shape starts to change. It is about 6 for single crochet, 3 for half double and 1 for double crochet.
From flat circle to sphere
A ball uses the same circle, then stops growing. You increase until the circle is as wide as the ball, work even rounds for the middle, then decrease in the same pattern you increased.
Here is the 3 inch ball the amigurumi calculator gives at 20 stitches and 20 rounds per 4 inches. The widest round needs about π × 3 × 5 = 47.1 stitches. The nearest multiple of 6 is 48, reached in round 8. Half the circumference, pole to pole, is about 24 rounds. Take away 8 rounds of increases and 7 of decreases, and the middle gets 24 − 8 − 7 = 9 even rounds.
| Round | Instruction | Stitches |
|---|---|---|
| 1 | 6 sc in a magic ring | 6 |
| 2 | inc in each st around | 12 |
| 3 | [sc, inc] x6 | 18 |
| 4 | [sc in next 2, inc] x6 | 24 |
| 5 | [sc in next 3, inc] x6 | 30 |
| 6 | [sc in next 4, inc] x6 | 36 |
| 7 | [sc in next 5, inc] x6 | 42 |
| 8 | [sc in next 6, inc] x6 | 48 |
| 9 to 17 | sc in each st around | 48 |
| 18 | [sc in next 6, dec] x6 | 42 |
| 19 | [sc in next 5, dec] x6 | 36 |
| 20 | [sc in next 4, dec] x6 | 30 |
| 21 | [sc in next 3, dec] x6 | 24 |
| 22 | [sc in next 2, dec] x6 | 18 |
| 23 | [sc, dec] x6 | 12 |
| 24 | dec x6 | 6 |
That makes 24 rounds in all: 8 rounds growing, rounds 9 to 17 even, and rounds 18 to 24 shrinking. Supergurumi gives a rule of thumb for the middle: work as many even rounds as the circle took, plus one. Here that is 8 + 1 = 9, the same as the calculator gives.
Start stuffing when the opening is about half the widest round, and top it up every round. Finish stuffing before the last round, then pull the tail through the front loops of the last 6 stitches to close.
Sources and further reading
Look At What I Made's spiral versus joining tutorial compares seams and starts. Pattern Princess on round circles covers chains in rounds and tubes. Dummies' how to crochet in the round shows the chain ring start, and Pops de Milk's working in the round shows spiral rounds without turning.
Two well-known tutorials follow the same shape. Supergurumi's guide to crochet balls and spheres increases by 6 to 36 stitches, offsets increases to avoid a hexagon, and adds the even-rounds rule above. Crochet Spot's sphere pattern builds a smaller ball to 30 stitches, works 4 even rounds, then decreases by 6 back to 6.
Video tutorial
"How to Crochet a Flat Circle | FOR BEGINNERS" by Adore Crea Crochet, on YouTube. The video loads only when you press play.