Quilting guide
How to hand quilt: needles, the rocking stitch and stitches per inch
Updated by Khokhar Sab
To hand quilt, baste the top, batting and backing together and mark your design. Thread a short betweens needle with about 18 inches of hand quilting thread and knot the end. Pop the knot into the batting, then rock the needle up and down through all three layers to load a few small running stitches at a time. End by popping a second knot into the batting.
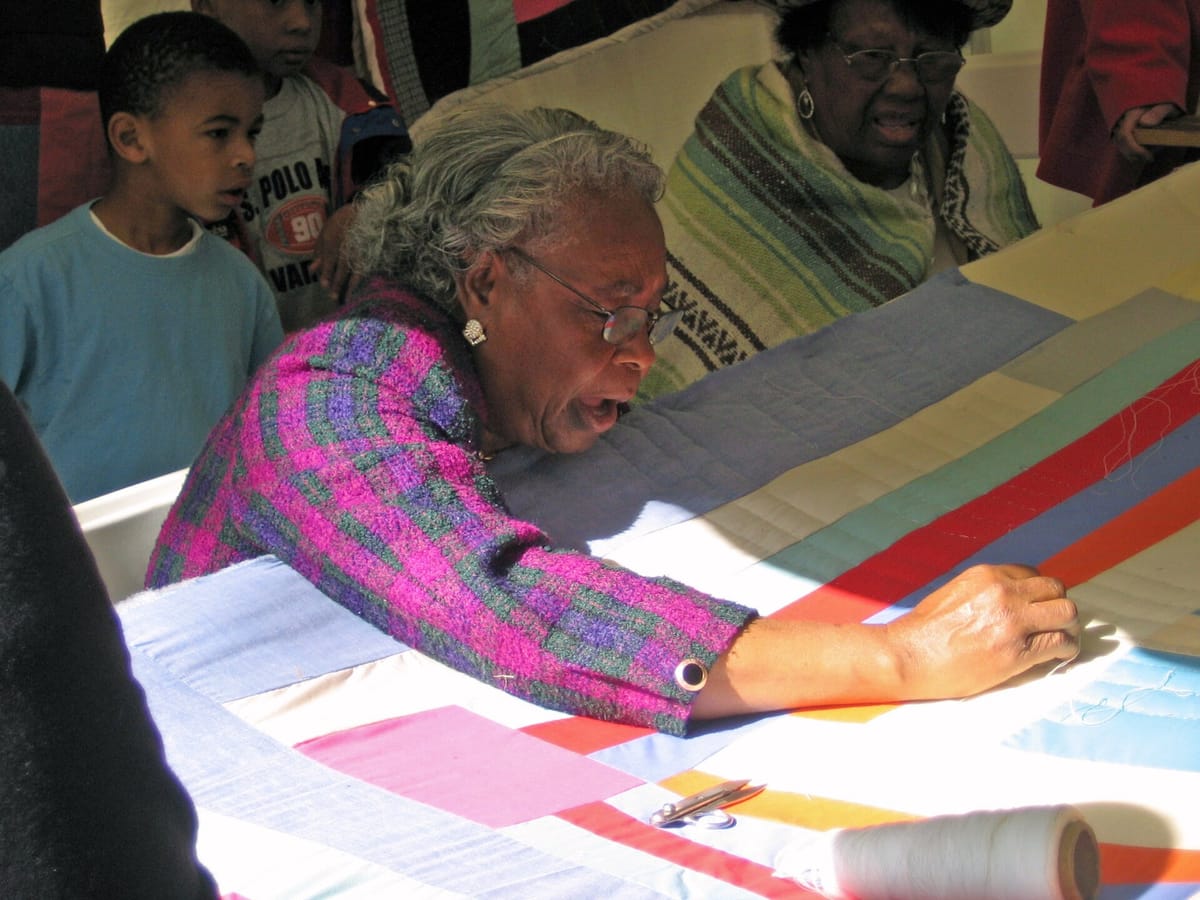
Hand quilting supplies
Hand quilting is a running stitch sewn by hand through all three layers of a quilt. Wikipedia describes it that way, and it needs only a few tools.
- Betweens needles. Hand quilting needles are called betweens. They are short and stiff, which makes it easier to rock the needle and keep stitches small. A higher size number means a smaller needle.
- Hand quilting thread. Gütermann makes its hand quilting thread from mercerized cotton with a waxed surface, so it runs smoothly and doesn't curl. The company labels it for hand quilting only, so keep it out of your sewing machine.
- A thimble. The University of Kentucky Cooperative Extension says a thimble is necessary for hand quilting. It recommends a tailor's thimble for beginners, worn on the middle finger of your sewing hand.
- A hoop or frame. Wikipedia notes that a hoop or frame holds the quilt off your lap. Missouri Star suggests a round hoop of 14 to 18 inches as portable and right for most hand quilting.
- Marking tools and small scissors. See the marking section below.
Which betweens needle size to use
Sources differ a little here. Missouri Star says beginners usually start with a size 8 or 9 and move to a 10 or 12 for finer stitches. Kentucky Extension lists sizes 8, 10 and 12 and says the fabric decides which suits. Craftsy reports that hand quilting pros favor a size 10, strong enough for the layers with an eye neither too big nor too small. Missouri Star's advice points to a size 8 or 9 first, then a 10.
Batting for hand quilting
Missouri Star calls wool batting the easiest for beginners because the needle slides through it. Cotton batting takes some breaking in, but it softens as you work. If you still need a backing, the guide to piecing a quilt back explains seams and overage.
Basting the quilt layers
Basting holds the top, batting and backing together while you quilt. Kentucky Extension lists these options, plus a basting gun:
- Thread basting. Long stitches in white all-purpose thread, at 4 to 6 inch intervals. Kentucky Extension says to hand baste a project before you put it in a hoop.
- Safety pins. Pins every 4 inches stop the fabric shifting. The handout says pins suit machine quilting best, and you take them out as you reach them.
- Basting spray. Spray the adhesive above the fabric and let it fall onto the surface, then lay the next layer on top.
Pins add up fast at 4 inch spacing. Counting the grid points inside each quilt size, a crib quilt needs about 96 pins, a throw about 192, a queen about 506 and a king about 598. Kentucky Extension still prefers thread basting for any piece that goes in a hoop.
Marking the quilting design
Kentucky Extension asks for markers that leave a thin, light line, and for a test mark on scrap fabric to check that it shows and comes out. Its picks:
- A sharp No. 2 pencil on light fabric.
- White or yellow chalk pencils on dark fabric.
- Plastic stencils or templates, which work after basting. Marking just before you quilt keeps lines from rubbing off.
- Masking tape as a straight guide for lines and grids.
Quilting in the ditch, along the seam lines, needs no marking at all. Create Whimsy also mentions a hera marker, a blunt tool that creases a line into the fabric. The table further down shows how much stitching a straight-line grid takes.
How to hand quilt with the rocking stitch, step by step
Kentucky Extension says to start in the center of the quilt and work out to the edges. Its steps, with Missouri Star's, go like this:
- Thread the needle. Pull about 18 inches of thread off the spool, thread the needle and then cut. Kentucky Extension says threading the end that comes off the spool tangles less.
- Knot and bury the start. Make a small knot and start the needle about 1 inch from your first stitch. Go through the top and batting only, and come up where the stitching begins. Tug the thread until the knot pops through the top and hides in the batting. The next section covers the knot itself.
- Set your hands. Thimble on the middle finger of your top hand. Put your other hand under the quilt, with one finger right below the spot where the needle goes in.
- Push straight down. Hold the needle upright and push it down through all three layers until the finger underneath just feels the tip.
- Rock it back up. Press down in front of the needle with your top thumb. Use the thimble to tip the needle back so the point comes up through the top. That makes one stitch on the needle.
- Load more stitches. Bring the needle upright again and repeat. Missouri Star suggests 2 to 4 stitches before you pull through. Kentucky Extension says to practice until you can load at least three.
- Pull the thread through. Pull gently until the stitches lie flat, pinching the thread at the eye so the needle doesn't unthread. Then start the next set one stitch length away.
Wikipedia names two other ways to work. The stab stitch makes one stitch at a time, straight down and straight up. Loading the needle means four or more stitches before each pull. Craftsy adds a hoop tip: don't hoop the quilt tight like embroidery, because the fabric needs room to move up and down.
Burying the knot to start and end a thread
For the starting knot, hold the thread end against the needle and wrap the thread around it, then pull the needle through the wraps. Sources disagree on how many wraps: Kentucky Extension uses two, Missouri Star three or four, and Bethany Lynne Makes four to six. Bethany Lynne Makes warns against a big knot, since it has to pop through the fabric.
To end, Kentucky Extension says to stop when 5 or 6 inches of thread are left on the needle.
- Make a circle of thread on top of the quilt and bring the needle up through it.
- Pull the circle smaller until a knot forms close to the quilt top.
- Put the needle back into the same hole the thread comes out of.
- Run it through the batting only and bring it up about an inch away.
- Tug until the knot pops into the batting, then cut the thread close to the top.
Missouri Star ties the end with a tiny backstitch loop and passes the needle through it twice. Another way is to weave the needle back and forth through stitches you have already made. To move between lines that are 2 inches apart or less, Kentucky Extension suggests traveling the needle through the batting instead of tying off.
How many stitches per inch for hand quilting?
Count the stitches on the top of the quilt along 1 inch. The sources agree that even stitches matter more than tiny ones:
- For beginners: Kentucky Extension and Craftsy both give 6 stitches per inch as a good first goal.
- For experienced quilters: Craftsy says 8 to 12 as your skill grows, and Missouri Star puts 8 to 10 as the later goal.
Kentucky Extension puts the top end plainly: "Some really great quilters can get as many as 10 to 12 stitches per inch." Missouri Star suggests holding the work up to a light to check that the stitches on the back match the ones on top.
How much stitching a hand-quilted grid takes
A straight-line grid is easy to measure, so its length is simple to work out. These tables take the six quilt sizes from the quilt fabric calculator and add lines parallel to both edges every 2 or 3 inches, with none on the outer edge. Stitch counts are the stitches on the top at 6, 10 and 12 stitches per inch, and leave out traveling and knots.
2 inch grid
| Quilt (inches) | Lines | Total length | At 6 per inch | At 10 per inch | At 12 per inch |
|---|---|---|---|---|---|
| Crib, 36 × 52 | 42 | 1,784 in (50 yd) | 10,704 | 17,840 | 21,408 |
| Throw, 50 × 65 | 56 | 3,160 in (88 yd) | 18,960 | 31,600 | 37,920 |
| Twin, 68 × 86 | 75 | 5,694 in (158 yd) | 34,164 | 56,940 | 68,328 |
| Full, 84 × 90 | 85 | 7,386 in (205 yd) | 44,316 | 73,860 | 88,632 |
| Queen, 90 × 95 | 91 | 8,410 in (234 yd) | 50,460 | 84,100 | 100,920 |
| King, 108 × 95 | 100 | 10,111 in (281 yd) | 60,666 | 101,110 | 121,332 |
3 inch grid
| Quilt (inches) | Lines | Total length | At 6 per inch | At 10 per inch | At 12 per inch |
|---|---|---|---|---|---|
| Crib, 36 × 52 | 28 | 1,184 in (33 yd) | 7,104 | 11,840 | 14,208 |
| Throw, 50 × 65 | 37 | 2,090 in (58 yd) | 12,540 | 20,900 | 25,080 |
| Twin, 68 × 86 | 50 | 3,796 in (105 yd) | 22,776 | 37,960 | 45,552 |
| Full, 84 × 90 | 56 | 4,866 in (135 yd) | 29,196 | 48,660 | 58,392 |
| Queen, 90 × 95 | 60 | 5,545 in (154 yd) | 33,270 | 55,450 | 66,540 |
| King, 108 × 95 | 66 | 6,673 in (185 yd) | 40,038 | 66,730 | 80,076 |
Spacing changes the job more than it looks. A queen quilted on a 3 inch grid has about 154 yards of stitching; closing the grid to 2 inches raises that to about 234 yards. At a beginner's 6 stitches per inch, that is 33,270 stitches against 50,460. A crib quilt on a 3 inch grid, at 7,104 stitches, is a far smaller first project.
How long does it take to hand quilt a quilt?
Missouri Star gives the only time figures among these sources. It estimates weeks to months for a first project, and 30 to 50 hours for a simple grid on a lap quilt. For scale, the throw on a 3 inch grid in the table above comes to 2,090 inches of quilting, or 12,540 stitches at 6 per inch.
Big-stitch hand quilting: an easier alternative
Big-stitch quilting uses thicker thread and longer stitches that show as part of the design. Create Whimsy rates it a beginner technique and calls it quick and easy. You don't need tiny, even stitches. Its tutorial gives these details:
- Thread: size 8 perle cotton, cut about 25 to 30 inches long. Longer lengths can fray.
- Needle: an embroidery (crewel) or chenille needle with an eye big enough for the thick thread. Colonial Needle suggests crewel sizes 5 to 7.
- Stitches: usually 1/4 to 1/2 inch long.
- Knot: a quilter's knot with two wraps, popped into the batting the same way as above.
You can stab each stitch straight up and down, or rock the needle to load several, just as with fine thread. Create Whimsy basted its big-stitch quilt with safety pins.
After the quilting is done
Take out the basting, trim the batting and backing, and bind the edges. The how to bind a quilt guide covers cutting strips and mitered corners, and the binding calculator works out how many strips to cut. When the quilt needs a wash, the how to wash a quilt guide has a section on antique and hand-quilted quilts. For finished sizes by bed, see the quilt size chart.
Sources and further reading
The University of Kentucky Cooperative Extension handout Quilting (CT-MMB.720) by Marjorie M. Baker covers marking, basting, needles, thimbles, the rocking stitch and knots. Missouri Star's complete beginner's guide to hand quilting gives needle and hoop sizes and time estimates. Craftsy explains stitch goals in How to Hand Quilt: The Basic Techniques. Create Whimsy has a big stitch hand quilting tutorial, and Gütermann describes its thread on the quilting product information page. Wikipedia, Bethany Lynne Makes and Colonial Needle supplied the stitch methods, knot tips and big-stitch needle sizes.
Video tutorial
"hand quilting for beginners, the rocking motion & knot" by quiltcrafts, on YouTube. The video loads only when you press play.