Quilting guide
How to make a quilt: a beginner's guide from cutting to binding
Updated by Khokhar Sab
To make a quilt, cut fabric into pieces and sew them together with a ¼ inch seam to build the quilt top. Layer the top over batting and a backing fabric, then baste the three layers together. Stitch through all three by machine or by hand, trim the edges and finish them with binding. A lap quilt of plain squares makes a good first project.
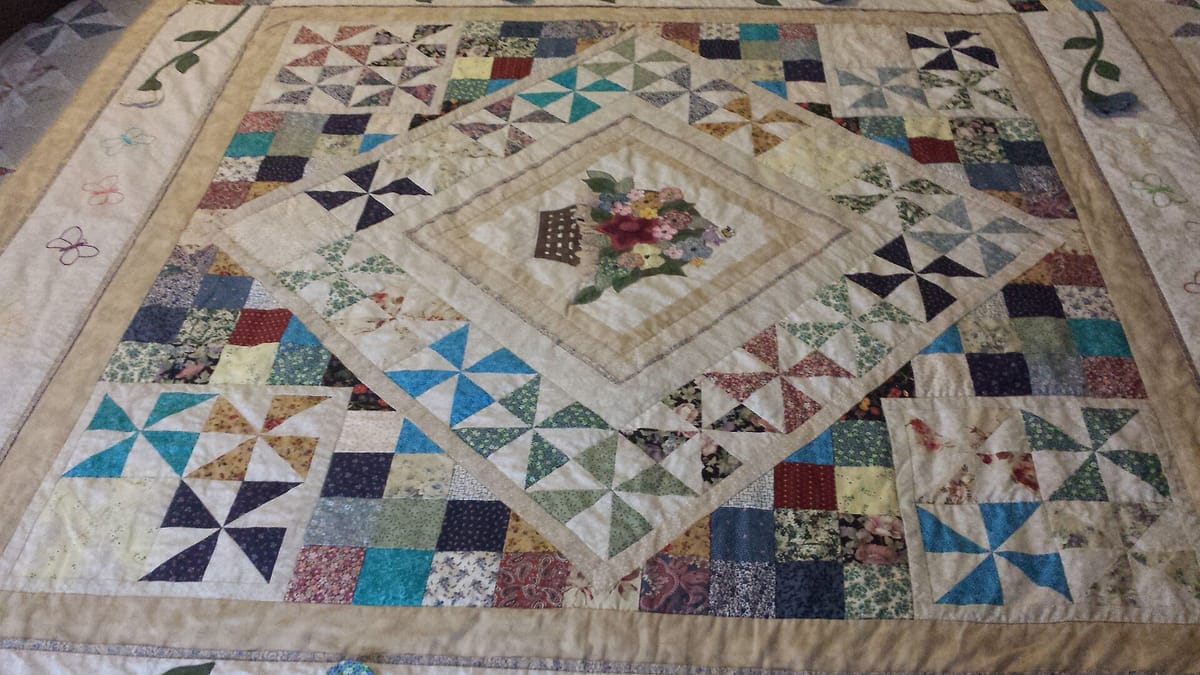
How to make a quilt: the steps at a glance
A quilt has three layers: a pieced top, a soft middle layer called batting and a backing fabric. Making one takes these steps:
- Choose a simple pattern and a size.
- Buy fabric and decide whether to prewash it.
- Cut the pieces accurately.
- Sew them with a ¼ inch seam.
- Press each seam.
- Join the blocks into rows and the rows into a top.
- Add borders if you want them.
- Layer and baste the quilt sandwich.
- Quilt the layers together.
- Bind the edges, add a label and wash it.
Choose a simple pattern and size
Missouri Star suggests plain squares or strips for a first quilt, with no triangles and no points to match. Its guide also says to make a first quilt lap sized and suggests 48 × 60 inches.
Molly Green says to choose the size right after the pattern, since quilts come in standard measurements. Published size charts differ by a few inches. The quilt size chart lists common sizes and the mattresses they fit.
What a simple squares quilt needs in each size
This table works out a quilt of 10 inch finished squares for each standard size, using the quilt fabric calculator. Each size is rounded to the nearest whole square, so the top comes out a little different from the preset. The calculator adds 4 inches of backing and batting on every side, uses 42 inch fabric and cuts binding strips 2½ inches wide.
| Size | Squares | Finished top | Backing | Batting | Binding |
|---|---|---|---|---|---|
| Crib | 20 (4 × 5) | 40 × 50 in | 2¾ yd (2 widths, seams across) | 48 × 58 in (throw package) | ⅜ yd (5 strips) |
| Throw | 35 (5 × 7) | 50 × 70 in | 3¼ yd (2 widths, seams across) | 58 × 78 in (throw package) | ½ yd (7 strips) |
| Twin | 63 (7 × 9) | 70 × 90 in | 5½ yd (2 widths, seams down the length) | 78 × 98 in (queen package) | ⅝ yd (9 strips) |
| Full | 72 (8 × 9) | 80 × 90 in | 7⅜ yd (3 widths, seams across) | 88 × 98 in (queen package) | ⅝ yd (9 strips) |
| Queen | 90 (9 × 10) | 90 × 100 in | 8¼ yd (3 widths, seams across) | 98 × 108 in (king package) | ¾ yd (10 strips) |
| King | 110 (11 × 10) | 110 × 100 in | 9 yd (3 widths, seams down the length) | 118 × 108 in (king package) | ⅞ yd (11 strips) |
Cut each square 10.5 inches, which adds a ¼ inch seam allowance on every side. A 50 × 70 inch lap quilt, the throw row, takes 35 squares, 3¼ yards of backing and ½ yard of binding.
The batting column holds a surprise. A twin top of 70 × 90 inches needs 78 × 98 inches of batting, which is too big for a twin package, so you buy a queen. The extra 4 inches on each side do the same to the crib, full and queen sizes. Only the throw and king fit their own package. A crib quilt needs a throw package, and a queen needs a king.
For any other size or block, enter your own numbers in the calculator. The guide to piecing a quilt back explains where the backing seams go.
Fabric, and whether to prewash it
Treasurie says quilters mostly use 100 percent cotton because it is firm and easy to work with. Molly Green also prefers cotton, since it washes easily and feels cozy. If you plan to buy fat quarters, the fat quarter size guide shows how many squares and strips each one gives.
Sources disagree on prewashing. Molly Green calls it an important step and says it removes extra dye, so colors won't run later. Treasurie also says to prewash all your fabrics. Homemade Emily Jane never prewashes quilting fabric and presses it flat instead. Missouri Star calls it a preference: prewashing prevents shrinking and dye bleed, while unwashed fabric cuts more crisply and crinkles after the first wash. It adds one rule: be consistent within a quilt.
Batting can skip this step too. The Warm Company says its Warm & Natural cotton batting goes straight from the package into the quilt.
Tools you need
Missouri Star lists the essentials for a first quilt:
- A rotary cutter and a self-healing cutting mat.
- An acrylic ruler. It suggests a 6 × 24 inch one.
- A sewing machine with a good straight stitch.
- A ¼ inch presser foot, which keeps the seam width the same every time.
- An iron and a firm pressing surface.
Treasurie adds a seam ripper, pins, curved safety pins and a walking foot. Homemade Emily Jane pieces with 50 or 60 weight cotton thread.
Cutting accurately
Press the fabric before you cut. Missouri Star squares it first. Fold it selvage to selvage and line the fold up with a grid line on the mat. Trim the ragged end at a true 90 degrees. Next, cut strips the width your pattern gives and cut those strips into squares.
Every cut size is the finished size plus ½ inch, one ¼ inch seam allowance on each side. That is why a 10 inch finished square starts as a 10.5 inch square. To find how much fabric a set of cut pieces takes, use the fabric yardage calculator.
Sewing an accurate ¼ inch seam
Quilting uses a ¼ inch seam allowance, and Missouri Star stresses that it must be the same every time. Small errors add up. If every seam on the lap quilt above is 1/16 inch too wide, each one takes ⅛ inch, and a row of 5 squares comes out ½ inch short. Missouri Star's test: sew three 2½ inch strips together, press, and measure. The unit should be 6½ inches wide.
Homemade Emily Jane notes that some quilters sew a scant ¼ inch, a thread or two narrower. If your test unit comes out short, your seams are too wide, so try a scant seam.
To save time, chain piece. Feed pairs through the machine one after another without cutting the thread between them. Missouri Star says this roughly halves sewing time.
Pressing seams
Press each seam before another seam crosses it. Pressing means lifting the iron and setting it down. Missouri Star says not to slide it.
Sources differ on direction. Molly Green presses seams to one side. Homemade Emily Jane notes that pattern designers often press seams open so they lie flat. She prefers to nest seams, or to press toward the darker fabric. Follow your pattern if it says.
Assembling blocks and rows
Lay the squares out on the floor or a design wall first. Treasurie suggests moving them around until the colors look right. Then sew the blocks into rows and the rows together.
Molly Green sews one row at a time and presses after each row. Line the seams up as you join rows so the corners of the squares meet. Treasurie also stresses matching seams at this stage.
Strips of fabric between the blocks are called sashing. The quilt sashing guide covers widths and cornerstones.
Adding borders
A border is a frame of fabric around the finished blocks. Measure the quilt through its center, both ways, and cut the border strips to those lengths. Patchwork Posse explains why: the edges stretch as you sew, but the center stretches less. Borders cut to the edge measurement come out wavy, while borders cut to the center pull the quilt back into square.
Treasurie adds the top and bottom borders first, then measures the sides including those borders and adds the side strips. Treasurie measures along the edges, so the two sources differ on where to measure. The quilt layout calculator shows how borders change the finished size.
Making the quilt sandwich and basting
The backing and batting must be bigger than the top, but sources give different margins. Missouri Star says at least 4 inches past every edge, and Molly Green makes the back 4 inches larger. Treasurie allows about 2 inches all round. The calculator uses 4 inches. Molly Green cuts the batting larger than the top but smaller than the back.
To layer, lay the backing right side down, then the batting, then the top right side up. Smooth each layer flat.
Basting holds the layers still while you quilt. You have three common choices:
- Safety pins. Missouri Star and Molly Green pin every 3 to 4 inches, and Treasurie about a hand width apart. Molly Green puts at least 100 pins in a twin quilt.
- Basting spray. Missouri Star and Treasurie both list it. Homemade Emily Jane spray bastes her quilts.
- Thread basting. Long running stitches that you pull out later. The hand quilting guide below explains when to use them.
Quilting the layers: machine or hand
Missouri Star calls straight-line quilting with a walking foot the easiest reliable finish. Lines every few inches, or a simple crosshatch, both work. Molly Green sets the stitch length to 2.0 to 3.0, and Treasurie to 2.5 to 3. Molly Green adds that large quilts usually start in the middle.
Check the batting package for how far apart the quilting can be. The Warm Company allows up to 10 inches for Warm & Natural. On a quilt of 10 inch squares, stitching along each seam gives lines exactly 10 inches apart, at that limit. Other battings allow different spacing.
You can also quilt by hand. Missouri Star says hand quilting works and calls it portable. The hand quilting guide covers the needle, thread and rocking stitch.
Binding the edges
After quilting, Molly Green squares the quilt up with a ruler. Binding then wraps the raw edges. The table above uses 2½ inch strips, the calculator's default. Molly Green uses wider 4½ inch strips on all but tiny quilts.
The guide to binding a quilt covers joining strips and mitered corners, and the binding calculator counts the strips.
Label it and wash it
Missouri Star suggests a label with "your name, the date, who it is for." Homemade Emily Jane notes that you can write on the back with a fabric marker.
A new cotton quilt shrinks a little in its first wash. The Warm Company expects 3 percent from its batting washed cold, and 5 percent washed warm. That shrinking gives the crinkled look of a washed quilt. The guide to washing a quilt covers detergent, color catchers and drying.
How long does it take to make a quilt?
Missouri Star estimates the time for a lap quilt step by step:
| Step | Time |
|---|---|
| Choosing a pattern and fabric | 1 evening |
| Cutting | 2 to 3 hours |
| Piecing the top | 6 to 10 hours |
| Basting | 1 hour |
| Quilting | 3 to 6 hours |
| Binding | 2 to 4 hours |
That adds up to 14 to 24 hours after the planning evening. A bigger quilt takes longer, and a twin top has 63 squares to the lap quilt's 35.
Sources and further reading
Missouri Star's complete beginner's guide gives the seam test, tool list and time estimates. Molly Green covers prewashing, basting and binding in Quilting for Beginners in 12 Easy Steps. Homemade Emily Jane walks through a full quilt in How to Make a Quilt from Start to Finish. Patchwork Posse explains measuring borders in How to Fix Wavy Quilt Borders. The Warm Company lists quilting distance and shrinkage on its Warm & Natural page. Treasurie's eight-step tutorial covers fabric, layout and borders.
Video tutorial
"ULTIMATE QUILT VIDEO - Make a Quilt from beginning to end. ALL the details." by MADE Everyday, on YouTube. The video loads only when you press play.