Quilting free course
Quilting for beginners: a free course from first cut to binding
Updated by Khokhar Sab
Quilting for beginners comes down to a few skills learned in order: cut accurately with a rotary cutter, sew a consistent ¼ inch seam, and press each seam flat. Then pick a size, work out the fabric, piece a top of plain squares, and layer, quilt and bind it. A lap or throw quilt of 35 squares makes a good first project.
Quilting for beginners: what to expect and how long it takes
This course takes you from an empty cutting mat to a finished throw quilt in 12 lessons. The first two lessons teach the basic skills right here on this page. The rest link to the guides and calculators on this site that cover each step in detail. Tick each lesson off as you go. Your progress stays in this browser.
Missouri Star says a first lap quilt takes "most people two to four weekends." Its estimate for each stage looks like this.
| Stage | Time |
|---|---|
| Choosing a pattern and fabric | 1 evening |
| Cutting | 2 to 3 hours |
| Piecing the top | 6 to 10 hours |
| Basting | 1 hour |
| Quilting | 3 to 6 hours |
| Binding | 2 to 4 hours |
That comes to 14 to 24 hours of work. Missouri Star also says the hardest part is cutting accurately and keeping a steady ¼ inch seam, and that getting consistent takes a few projects. So expect your first quilt to have a few crooked seams. Patchwork Posse makes the same point: a first quilt does not have to be perfect.
What you need to learn to quilt
You need a short list of tools, some cotton fabric and a sewing machine that sews a straight stitch. The practice project at the end of this course is a 50 × 70 inch throw made of 35 squares, each 10 inches finished. The site's calculators give these amounts for it.
| Part | What to buy | Notes |
|---|---|---|
| Squares | 3⅞ yards, or 18 fat quarters | 35 squares cut 10.5 × 10.5 inches. The yardage includes 10% extra, and each fat quarter gives 2 squares. |
| Backing | 3¼ yards | 2 widths of 42 inch fabric, 4 inches bigger than the top on every side. |
| Batting | One throw package | You need 58 × 78 inches. |
| Binding | ½ yard | 7 strips cut 2½ inches wide. |
Missouri Star suggests 100 percent quilting cotton, which presses crisply and holds a seam. A precut bundle saves you choosing colors and cutting. Missouri Star lists a charm pack as forty-two 5 inch squares and a layer cake as forty-two 10 inch squares. For other piece sizes, the fabric yardage calculator works out the yardage.
The lessons
0 of 12 done
Gather the tools and learn rotary cutting
The short list of tools that matter on day one, then how to square fabric and cut strips and squares safely with a rotary cutter.
Practice: Square up a fat quarter and cut four 5 inch squares. Close the blade after every cut.
Sew a ¼ inch seam and press it
The seam allowance every quilt pattern assumes, a test that shows whether yours is right, and how to press without stretching the fabric.
Practice: Sew three 2½ inch strips together, press, and measure. The unit should be 6½ inches wide.
Fat quarters and precut fabric
What a fat quarter is, how many squares and strips one gives, and how many you need for a quilt.
Choose a quilt size
Standard quilt sizes from crib to king and the mattresses they fit. A throw or lap size suits a first quilt.
Work out how much fabric to buy
Enter the finished size to get yardage for the backing, batting and binding in one list.
Practice: Enter 50 × 70 inches and compare your result with the practice project below.
Make your first quilt, start to finish
The whole process for a simple squares quilt: rows, borders, the quilt sandwich, basting, quilting and binding. The lessons after this go deeper on each finishing step.
Add sashing between blocks
Strips between the blocks and cornerstones where they meet, with cut sizes and how sashing changes the quilt size.
Half-square triangles
Your first block beyond squares. Compares making two, four or eight at a time and what each method costs in fabric and accuracy.
Practice: Make two half-square triangles and trim them to size before you start a whole quilt of them.
Piece the quilt back
Where the backing seams go, how much extra to leave on each side and when wide backing saves a seam.
Quilt the layers by hand
Needles, thread, a thimble and the rocking stitch, plus big-stitch quilting if you want quicker, bolder lines.
Bind the edges
Cutting and joining binding strips, sewing them on and turning neat mitered corners.
Wash and care for the quilt
The first wash, detergent, color catchers, drying and how much a new cotton quilt shrinks.
Lesson 1: the tools you need
Missouri Star splits beginner tools into what you need now and what can wait. These are the ones it says to have on day one.
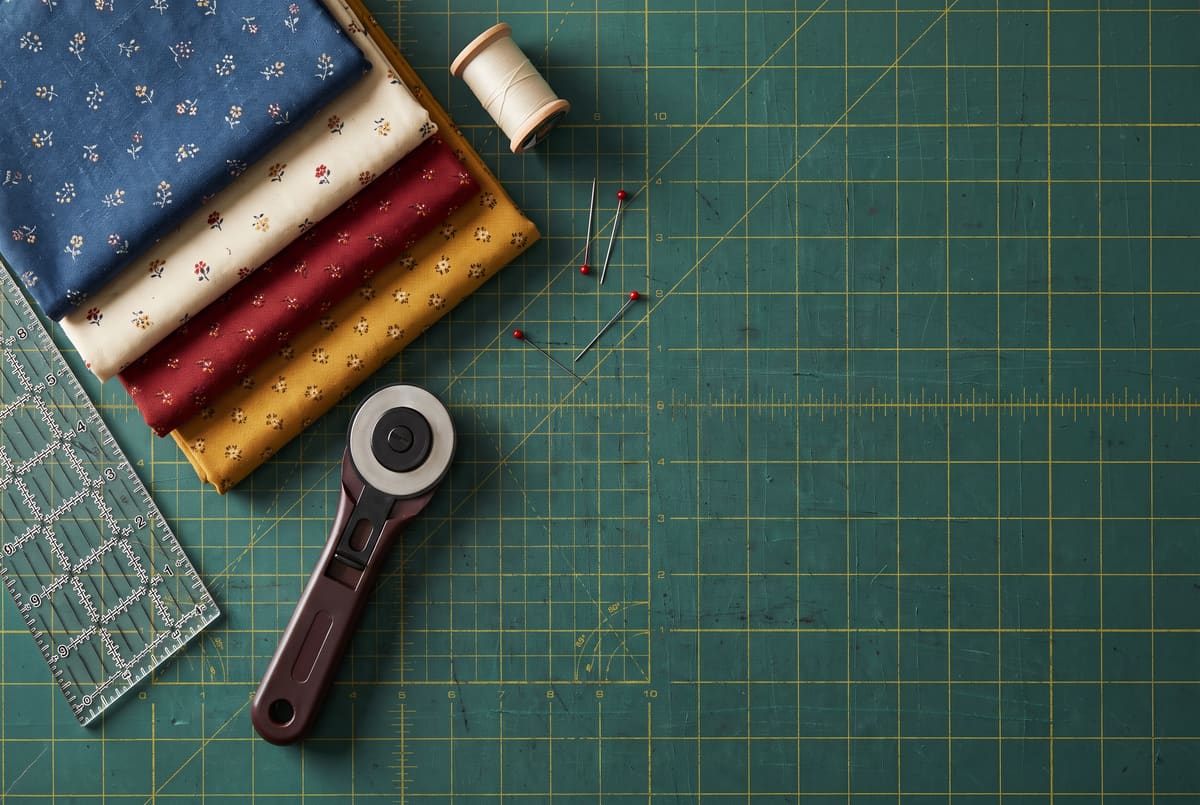
- A rotary cutter. It calls this the biggest accuracy upgrade a beginner can make.
- A self-healing cutting mat. It protects the table and gives you a grid to square fabric against. Molly Green recommends a 36 × 24 inch mat.
- An acrylic ruler, 6 × 24 inches. It guides the cutter and measures at the same time.
- A ¼ inch presser foot. It makes the seam the same every time.
- A sewing machine with a good straight stitch.
- An iron and a firm pressing surface.
A walking foot comes next, for quilting the three layers together. Missouri Star says gloves, clips and marking pens can wait. Molly Green adds pins to the list, and a seam ripper helps when a seam needs unpicking.
How to use a rotary cutter safely
A rotary cutter is a round blade on a handle. It cuts through several layers of fabric along the edge of a ruler. The steps below come from Olfa, which makes rotary cutters, and from Missouri Star.
- Clear the mat. Olfa says to remove pins and scraps first, since they can damage the blade or cause an injury.
- Press the fabric. Patchwork Posse says to press wrinkled fabric before you cut.
- Square the fabric. Fold it selvage to selvage and line the fold up with a grid line on the mat. Trim the ragged end at a true 90 degrees. Missouri Star says every later cut depends on this one.
- Stand up. Olfa says sitting while cutting isn't recommended. Look down on the ruler lines so you can cut without moving.
- Hold the ruler firmly. Keep your fingers away from its edge. Wrap your cutting hand around the handle with your index finger on the ridge above the blade.
- Cut away from your body. Run the blade along the ruler edge in one smooth stroke.
- Close the blade. Olfa says to close it after every cut and never lay the cutter down with the blade open.
- Change dull blades. Missouri Star says a dull blade skips threads and makes you press harder, which is how cuts drift.
To cut squares, first cut strips across the width of the fabric, then cut the strips into squares. On 42 inch fabric with the selvages trimmed, you have about 40 inches to work with. A 10.5 inch strip gives 3 squares, so the practice throw takes 12 strips.
Lesson 2: the ¼ inch seam
Patchwork Posse notes that most quilt patterns use a ¼ inch seam allowance. That is why every cut piece is ½ inch bigger than its finished size: ¼ inch on each side. A 10 inch finished square starts as a 10.5 inch square.
Small errors add up. If each seam is 1/16 inch too wide on both pieces, it takes ⅛ inch from the quilt. Across a row of 5 squares, that is ½ inch short. Down 7 rows, it is ¾ inch. Then the rows stop lining up.
Missouri Star gives a test. Sew three 2½ inch strips together, press, and measure. The unit should be 6½ inches wide. If it comes out short, your seams are too wide. Move the needle position or the guide on your foot and test again.
Patchwork Posse adds one more check. Make your first block and measure it before you sew the rest.
How to press seams
Pressing is different from ironing. Missouri Star says to lift the iron and set it down without sliding it. Sliding stretches the fabric and can warp a block before you join it.
- Press the seam flat while it is still closed. This sets the stitches.
- Open the pieces and press the seam allowance to one side or open.
- Press each seam before another seam crosses it.
Sources differ on which way to press. Sew Nikki presses toward the darker fabric. Missouri Star treats open or to the side as a real choice that depends on the block. If your pattern gives a direction, follow it. Patchwork Posse says pressing as you go helps blocks lie flat and makes seams easier to match.
Practice project: a simple patchwork throw
Your first quilt brings all 12 lessons together. Make a throw of 35 plain squares, 5 across and 7 down, for a finished top of 50 × 70 inches. Plain squares have no points to match, so you can focus on cutting and seams.
- Buy the fabric in the table above, or check your own numbers in the quilt calculator.
- Cut 35 squares at 10.5 inches, using lesson 1.
- Do the seam test from lesson 2 before you sew any squares.
- Lay the squares out, sew them into 7 rows of 5, and press after each row.
- Sew the rows together, matching the seams where the squares meet.
- Follow the guide to making a quilt for the quilt sandwich, basting and quilting.
- Bind the edges, add a label and wash it.
When the throw is done, try a quilt with sashing or a block of half-square triangles. Those are lessons 7 and 8.
Common beginner mistakes
- Skipping the seam test. Missouri Star says ten minutes of testing saves an afternoon of unpicking.
- Sewing every block before measuring one. Patchwork Posse warns against finding out late that all your blocks are the wrong size.
- Cutting with a dull blade. It drags and pushes the fabric out of line.
- Sliding the iron. Lift and press instead, or blocks stretch out of square.
- Too few basting pins. Missouri Star traces most puckered backings to sparse basting. It pins every 3 to 4 inches.
- Buying too little backing. Allow at least 4 inches past every edge of the top.
- Sewing over pins. Molly Green warns this can break the needle. Pull each pin out just before it reaches the presser foot.
- Starting too big. Missouri Star says a big quilt is harder to quilt, because the whole thing has to pass through the machine.
Frequently asked questions
How long does it take to learn to quilt?
Missouri Star says you can finish a simple quilt in your first month, and that getting consistent takes a few projects. Its stage-by-stage estimate for a first lap quilt adds up to 14 to 24 hours after an evening of planning.
Do I need an expensive sewing machine to start quilting?
No. Missouri Star says any machine that sews a reliable straight stitch will piece a quilt. It rates a ¼ inch presser foot and a walking foot as more important than the price of the machine.
What is the easiest first quilt for a beginner?
A quilt of plain squares or strips, with no triangles and no points to match. Patchwork Posse also lists charm squares, jelly rolls and fabric panels as easy starts. The practice project on this page uses 35 squares.
How much fabric does a beginner quilt need?
The 50 × 70 inch throw on this page needs 3⅞ yards for the squares, 3¼ yards of backing and ½ yard of binding. For any other size, use the quilt calculator.
Can I learn to quilt without a sewing machine?
Yes. You can piece and quilt entirely by hand, though it takes longer. Missouri Star calls hand quilting portable. The hand quilting guide covers the stitch and the tools.
Sources and further reading
- Missouri Star: how to quilt, a complete beginner's guide.
- Olfa: using a rotary cutter properly is the key to safe cutting.
- Patchwork Posse: 13 quilting basics every beginner should know.
- Sew Nikki: learn how to quilt for absolute beginners.
- Molly Green: quilting for beginners in 12 easy steps.
Video tutorial
"Ultimate Beginners guide to making a Quilt | Step by step tutorial" by LoveCrafts, on YouTube. The video loads only when you press play.